top of page

All Posts

So, if you've been keeping up with our social media (at least on Bluesky and Youtube) you might've noticed that our combat system has changed.


ree
A lot more furious, huh?

This was, admittedly, by a bit of serendipity, but we welcome it nonetheless; our network programmer knows a few tricks on how to program combat, too, and has been a great help in getting the dynamic movements and systems up to snuff in a VERY short amount of time; to the point we're eager and excited to push forwards. Not only is Miranda feature complete in regards to abilities/moveset, but it allows for more advanced combat techniques we were unable to have before! We'll be studying these and letting you know in the future!


If this interests you, considering wishlisting!
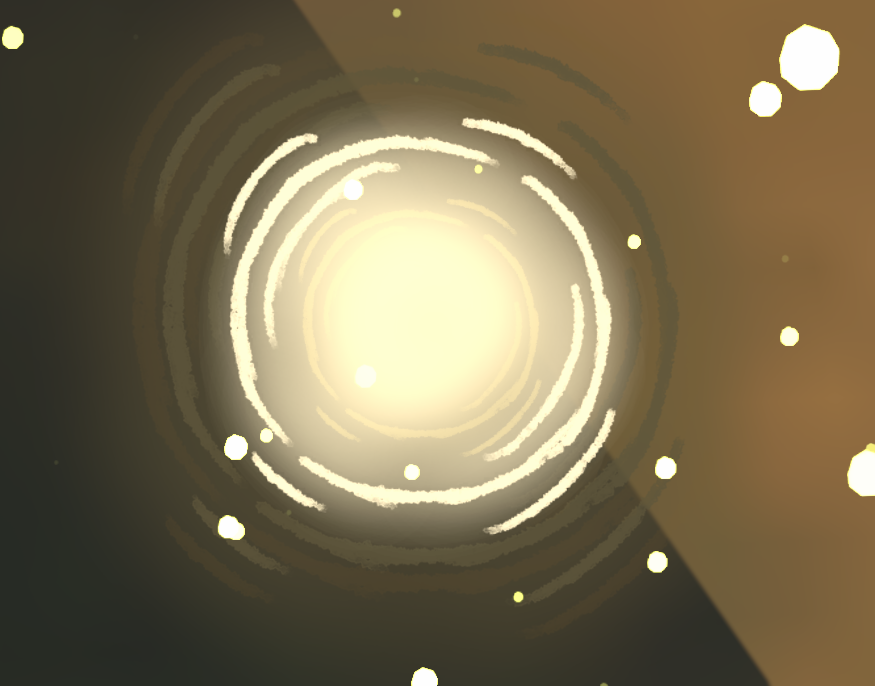


Well, you know the basics of how to fight, let's get into some detail on how to use that beatdown knowledge! So, what is this game about? Well, putting it plainly, these:


Lookit the shiny thing!

These are 'Motes'. As in 'motes of energy', but don't worry about that. Point is, it is paramount that you collect these. These are your currency in this game, and all modes will involve you getting some one way or another- but those details can come a little later. You want Motes. In many ways, Motes are how you win.


Now, how do you GET Motes? Objectives.


It's you and your squad's task to accomplish whatever objective you've signed up for today. You do that, you win the match, you get Motes. Simple in theory, harder in practice. So, just what are 'Objectives'?


Those are the game modes! Each mode has a different Objective, with a different win condition. While beating your opponents up will certainly be useful, you can only win by accomplishing the Objective. And that can vary quite a bit. First of all, these are the general descriptions for the Objectives:


Takedown


This is basically the big one. Every team is presented with a high-value NPC enemy target. There's only one on the field at the time, and WHERE it is isn't always the same place twice. You also don't get to know where it is BEFORE the match starts- that's right, you have to find your mark before taking it down, after all!


So! There are two steps to this, and two ways you can score. First, be the one to deliver the killing blow- you're awarded a point and a cash reward for your team if your team are the ones to land the killing blow! Secondly, you still need proof that they're dead- and they'll always leave something behind. It's your task to grab the proof, and return the ‘marker’ that the target drops upon death to your specific base for another point. Keep in mind, however...any serious impact will result in the proof being dropped- and meaning that someone can abscond with the fruits of your hard work to get a point! And if that wasn't enough, carrying the proof will prevent special moves from being executed; you have to be careful with your cargo, after all! If you try anyway, it'll be dropped upon using a special move. So once you've taken down the target and gotten the proof, move quickly, move carefully, and make sure you've got backup to keep the vultures off you!


Whoever has the most points, OR the predetermined number of points when time runs out wins!


Scavenger


Ooh, this here's a fun one. A real scramble! There are a number of NPC enemies on the field, as well as high-value items. No loose Motes here! You have to find enemies, or Treasures- enemies give fixed amounts of currency, while Treasures give out much higher amounts- IF you can hold onto them by the time the game ends. You kill another player, and that causes them to lose a fixed amount of their currency, and up to two Treasures which opponents can pick up. Be warned, however- there are finite amounts of Treasures, AND finite amounts of enemies, which means that when all the enemies are dead, and all the Treasures are claimed, there's only one more recourse... It's a scramble to make yourselves, quite literally, the Most Valuable Team!


The winner is the one with the most currency when time is up, and you bank that amount all for yourself!


Marked Target


This one's a little different, and it's for people who like to live...dangerously. For one, THIS mode is taken solo. That's right, no team to back you up here! A specific player is Marked for a bounty via a very notable icon over their head. Those who are not Marked have the Objective to kill the Marked Target...but the Marked Target's Objective is to kill all of their pursuers! That's right, up to 11 other players all trying to dogpile one! As an equalizer against the horde of opponents, however, the Marked Target is given much higher health, speed, and damage than normal. The Marked Target gains money for killing the Pursuers, and there are no respawns in this mode, so watch out! The Marked Target is changed after the time runs out, the Marked Target is killed, or everyone else is killed. After a set amount of time, the game is over, and only the winners bag the cash- with the Marked Target getting quite the hefty bonus in comparison if they survive.


Those are some examples of the modes we have in mind and are preparing to introduce into the Showdown. Look forwards to more news soon!


That's right- we're going over the basics of how to fight today! (We're aware of the missing textures in the pictures, ignore those please.)


Put simply, everyone has a suite of moves to help them beat down the competition. They vary in terms of power, speed, and a bunch of other things, so it's up to you to determine what Outgoer your style meshes with best! That said, when fighting, it's important to keep an eye on your STAMINA.


Your Stamina determines if you can or can't do a few things, so be mindful. Understanding and managing your Stamina is paramount to winning a Showdown. Don't worry, basic attacks won't drain Stamina, but certain techniques will. It doesn't always fill up quickly, either!


As for what everyone can do, you CAN put most everything into the following categories:


Movement

There are a few universal movement options in Magical Showdown to make sure everyone can get around and traverse with the best of them:


Running

Standard movement option, nothing too special here. Everyone has the same base run speed, so don't worry there.


Sprinting

This is when things start to get a bit more unique. Characters have different sprint speeds. It (slowly) drains Stamina to do so, but Sprinting is the movement of choice oftentimes to get from point A to point B quickly!


Lock On

If you're having trouble keeping your eyes on your opponents, you can always Lock on to them with the push of a button. This keeps your character focused on a target and your hits much more accurate.


Focused anger. Always fun.

Light Attacks

How it starts.
How it starts.

Your basic bread and butter. Light attacks come out quickly, and are generally used to start engagements. Use them to interrupt heavy attacks or quickly finish off an enemy low on health. You generally have the ability to chain three light attacks together- an opener...


How it continues.
How it continues.

A 'linking' second attack...


How it ends.
How it ends.

And a third 'ender'. Light combos are designed to keep the opponent in a position that you can follow up from in SOME manner. No two light combos are alike between characters, however, so the followups are different as well. Learn how your character's Light Attacks operate, and you'll open up a ton of options on the field.


This also applies to aerial light attacks- they're excellent for interrupting an enemy's momentum, but otherwise operate on the same principles.


Bop.
Bop.

Light attacks also include Dash Attacks, an attack you can perform by hitting the attack button while Sprinting. These are nice ways to not have to stop Sprinting to run- they don't hit hard, but they can lead into good offensive flurries on unsuspecting targets.


Incoming!
Incoming!

Heavy Attacks

Heavy Attacks are more brutal, but more damaging. Although you have strings of three as well, at the minimum, Heavy Attacks can have a number of different applications- some just hit hard, others can apply different effects or put you in particular situations.

Miranda's Heavies are all forward advancing and deliver high stun, keeping her close to the opponent and pressing her advantage.

The windup...
The windup...

And the hit!
And the hit!

They all still chain into each other, but unlike light attacks, Heavy attacks tend to blow the opponent away in some fashion, or otherwise reset the situation to a more neutral state. Not always, though! Use them well, and you'll be unstoppable- but use them recklessly, and you're in for a rough time.


Power Moves

Power Moves (or Special Moves to some) are your real difference makers. Each of them are unique to the character you pick, and you have, again, three of them. These moves can massively help and are often core to your character's playstyle, so make sure to learn the ins and outs of them!


Miranda's 'Sonic Haymaker' rushes her forwards VERY quickly a good distance, allowing her to close in on a seemingly distant opponent, and deliver a devastating hit before they can react.

That's not to say you ONLY have offensive techniques, however! You have defensive measures as well, and you'll need them to survive the onslaught that the Showdown tends to bring.


Blocking

Sounds simple, but it's very useful. Blocking mitigates (almost) all damage from in front of you; and more importantly it allows you to respond to anyone's attempts at aggression quickly while they're stuck in the follow-through of their attack.


ree

In particular, blocking certain NPC attacks...


ree

Can lead to excellent opportunities to attack! Be wary, however- some attacks CANNOT be blocked, such as anything that 'grabs' you. Be careful, and you can use blocking to great effect!


Dodging

Dodging is often a cleaner option than blocking- it renders you completely invulnerable for the dodge's duration, moving you in the direction of your choice to prep for a counterattack.


Can't catch me.
Can't catch me.

However, dodging takes Stamina, so be careful! If your Stamina gets too low, you can easily attempt to dodge, only to stand there looking silly.


Repel

This is way to clear out anyone who's feeling a bit TOO aggressive against you- or multiple such people!


They aren't about to have a good time.

Repel is a completely invincible, 360 technique that, if it hits, will blow ANYONE nearby away to allow you to turn the tides or get to safety, unless they're blocking- other 'invincible' moves will still get Repelled. It's not flawless, however- there's a bit of startup to it, no matter who uses it, so if someone's perceptive enough to see it coming, and smart enough to quickly retreat before the attack itself goes off...well, you've sadly got a lot of pain coming your way if you're unlucky. Not to mention, the attack takes HALF of your Stamina on startup, so use it wisely!


These are the core combat mechanics of Magical Showdown, so keep them in mind for in the future! All of these moves and the myriad of effects and states they can lead into means that combat can get rather deep at the end of it- especially when you have two other teammates you have to keep in mind for fighting alongside. Be prepared! Next time, we go over a few other things- like just what these magical beings are all trying to DO here...


© 2035 by Polygon. Powered and secured by Wix

bottom of page